
I like the idea of a foil booster, and the version offered from Australia–the Foil Drive–seems effective if a bit expensive for what it is. Downwind foiling has always been my aim, but the likelihood of me being able to do it with just a paddle is very small. I have most of the parts I’d need to build a boosted foil–or an eFoil for that matter, but boosting up and free foiling is what I really want to do. So I’m building one. mine will be a bit heavier, but it will be much more powerful and capable of going further.
My plan is to make the battery modular so I can choose how much weight I want to carry. I’ll update this during the build.
Making the Battery and Electronics Box
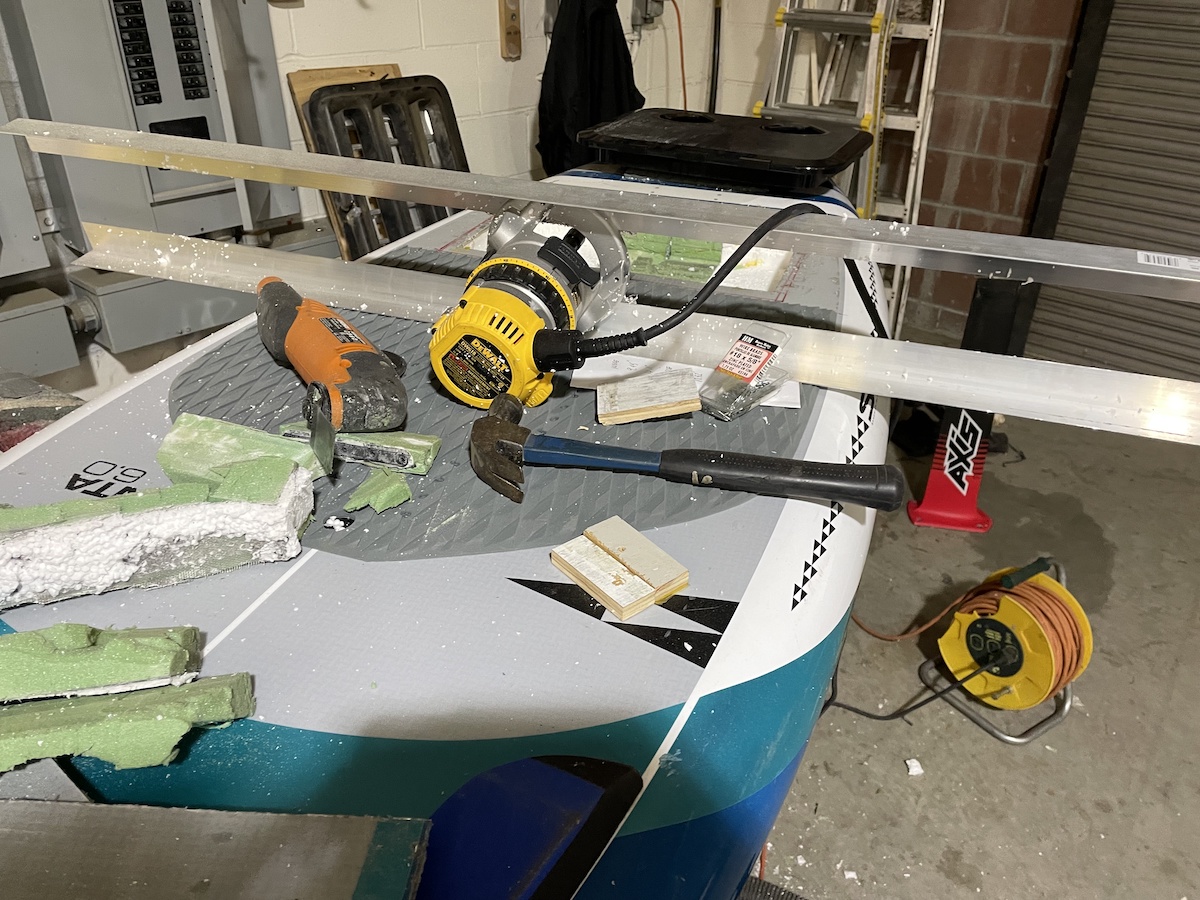
I did the rough cut of the box with a multitoool, removing the layer of fiberglass and carbon. The carbon was well-adhered, especially on the Divinycell so that was a bit of a bitch.Then I added bridging legs made from angle aluminum and a extension collet to my router and did the finished cuts.
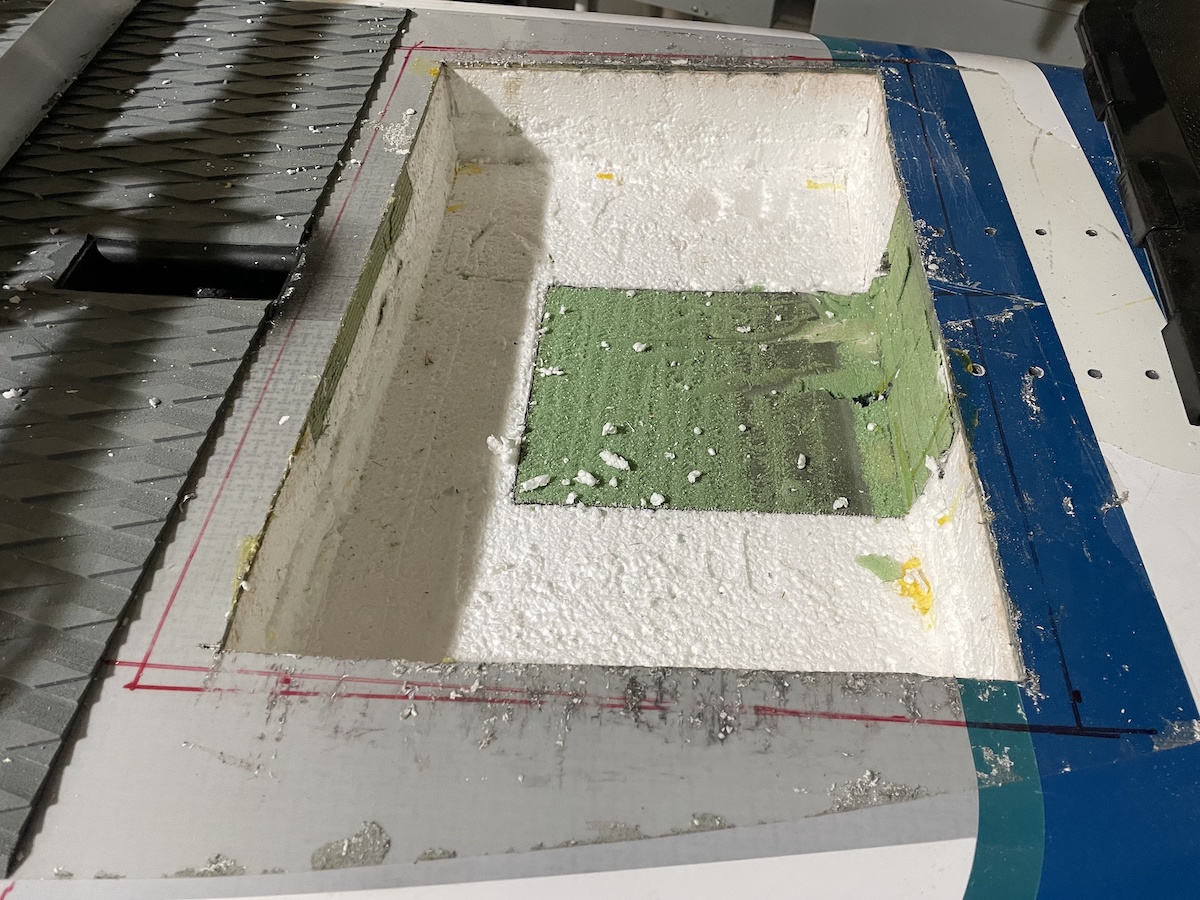
The box is as deep as I can make it, the mast tracks can be seen through the green divinycell foam (not clear in the picture).
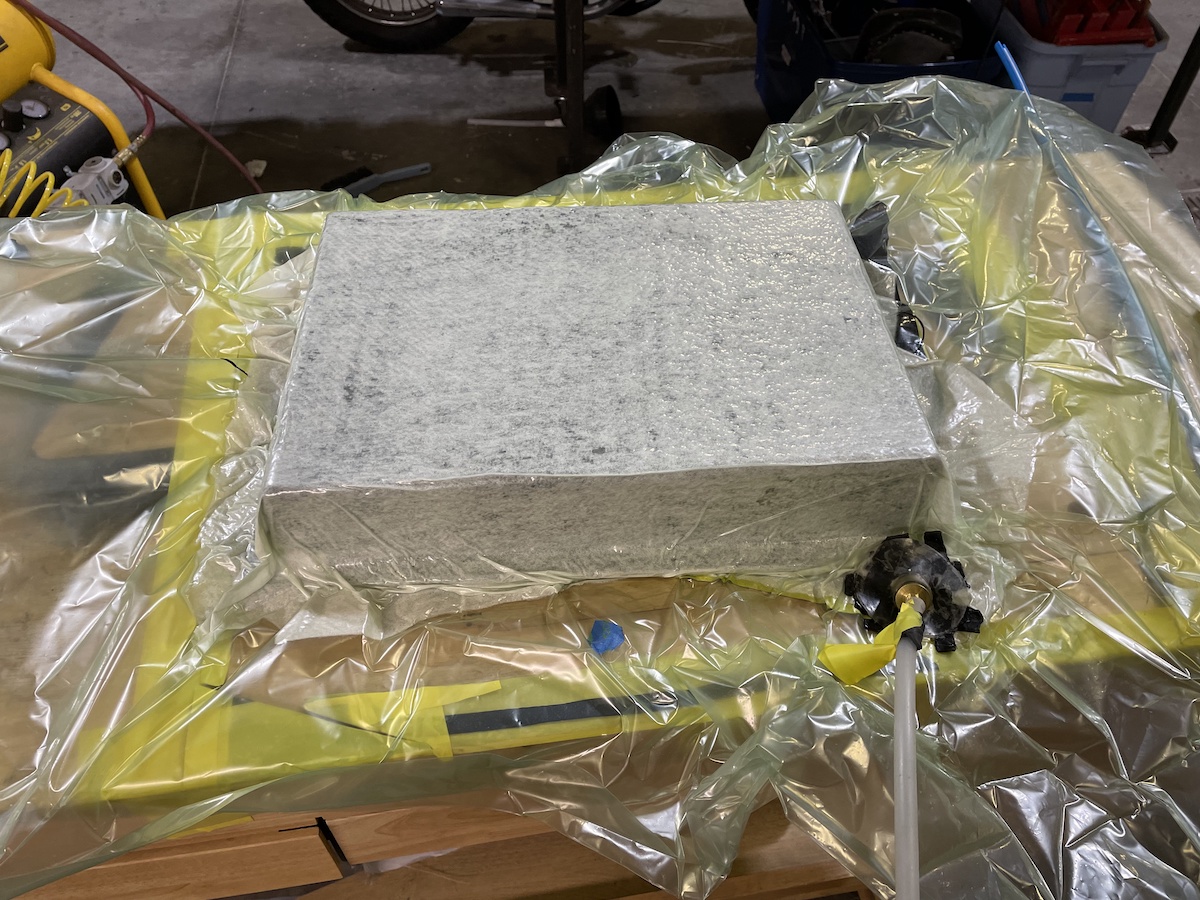
I made up the box with 1/4″ marine plywood covered with two layers of carbon fiber on the outside
Expanding foam to fill all the nooks and crannies, and hold the foil box in place. Always makes a mess but at least I didn’t get it in my hair this time (long story).
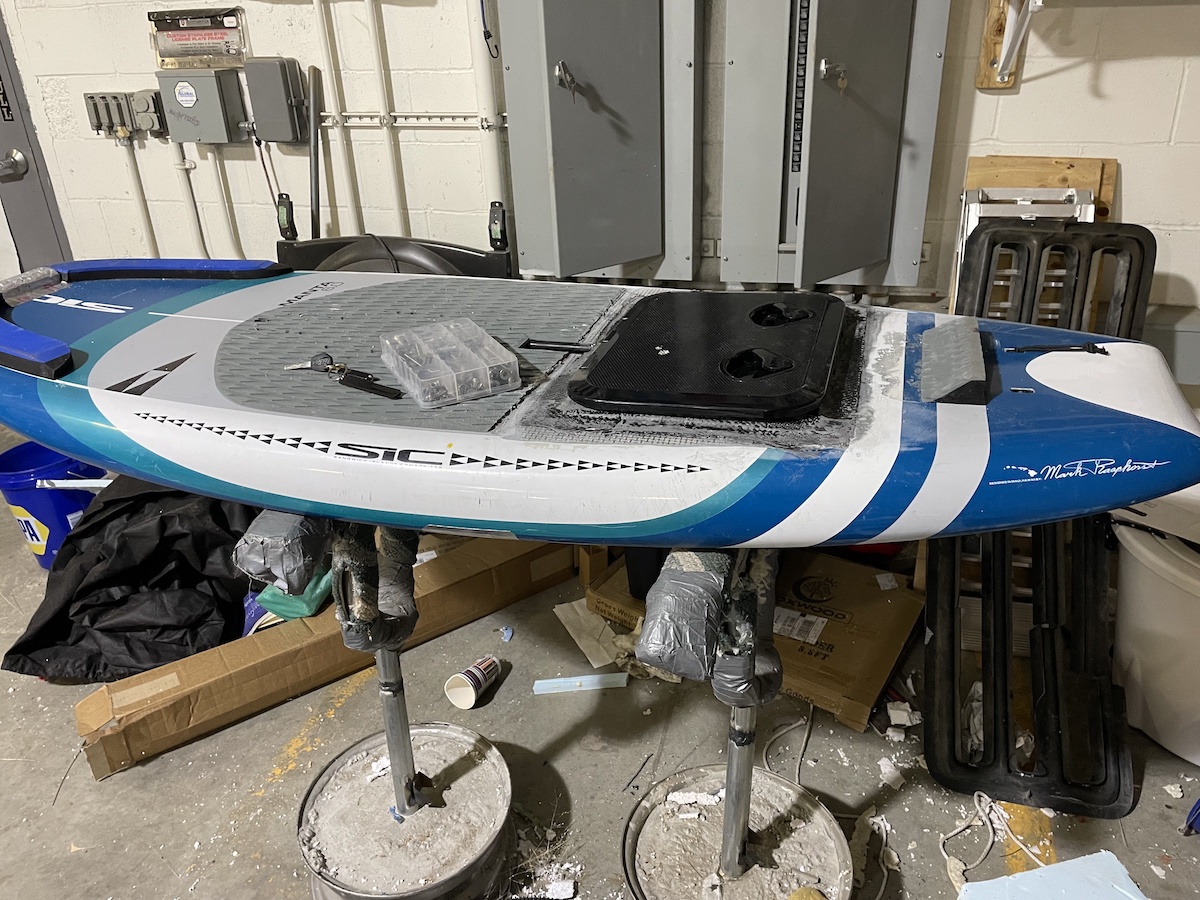
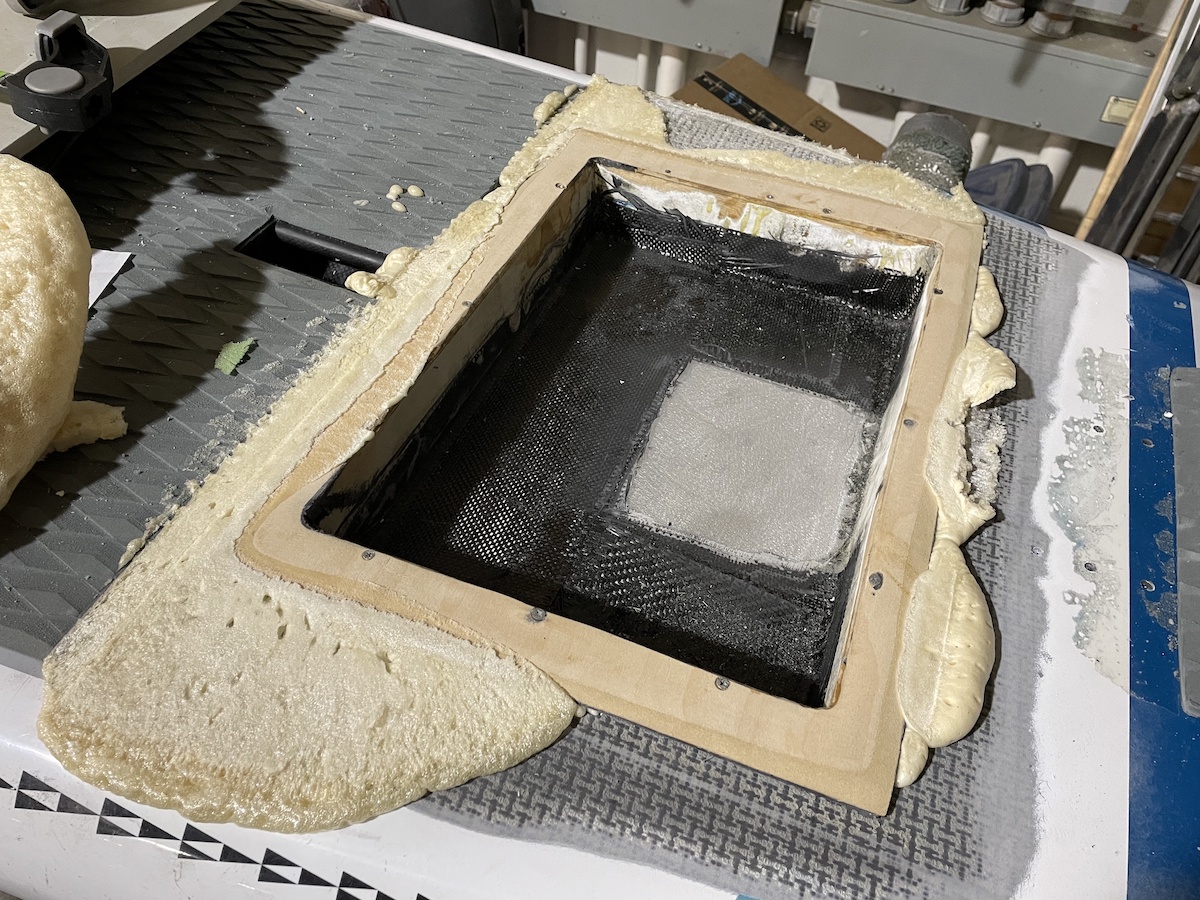
Two layers of carbon on the rim of the box and the hatch cover set in place.

With the slight rise of the hatch cover and the box depth, I have room for the electronics and two 51.2 volt LiFePO4 batteries that I’ll build myself. I’ll probably only use one at a time. The bright spot in the bottom of the box is exposed aluminum. I put a plate of anodized aluminum inside the box to act as an additional heat sink. I don’t think I really need it given intermittent use, but belt and suspenders. I covered the aluminum with a layer of fiberglass to insulate it from the carbon fiber, though the clear anodizing might be enough insulation to prevent electrolysis. The carbon in the inside of the box is table wetted and laid in place but not vacuum bagged as the outside is. I think this all will be enough to keep the board from folding in half–I guess we’ll see if I’m right.
Adding the foil and motor
So I already did most of the fabrication of this setup before I started taking pictures.
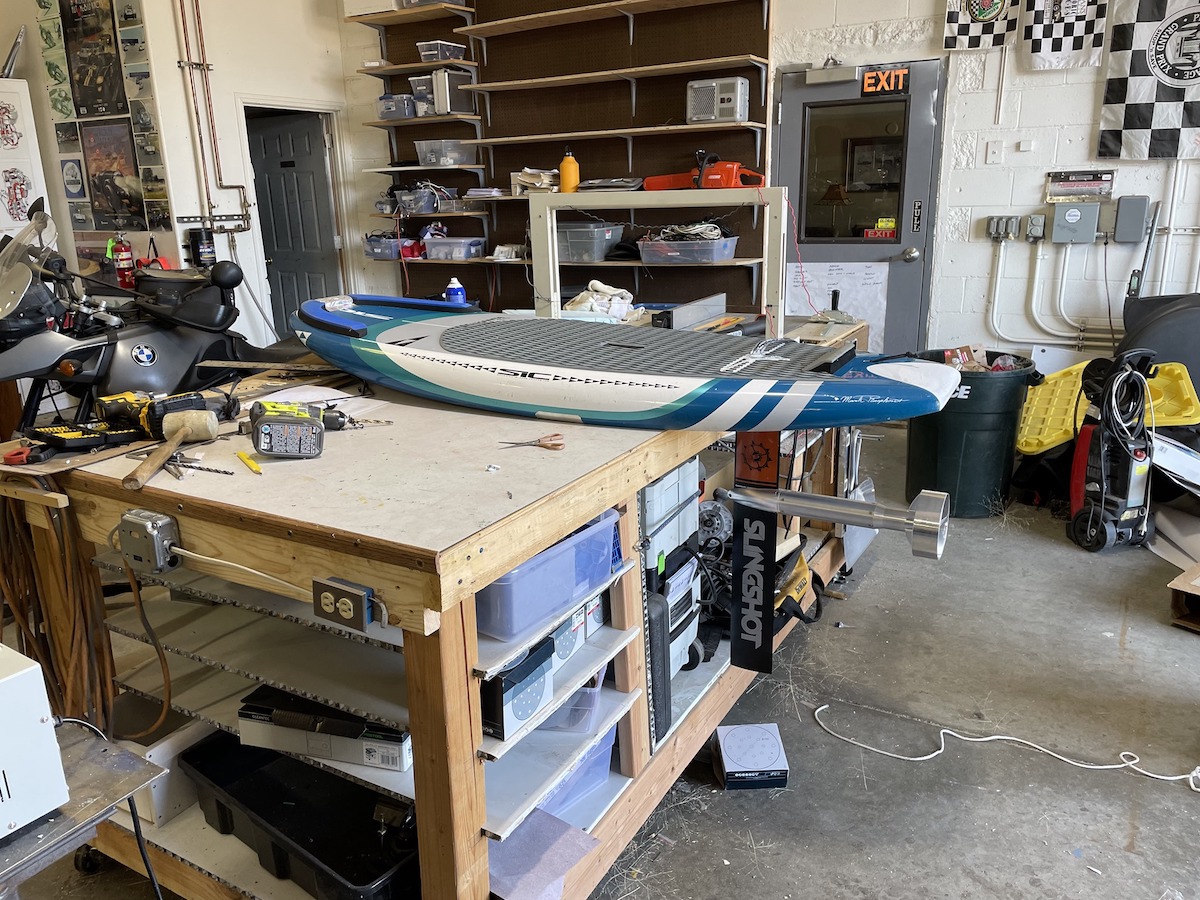
This is the board with the mast and motor added. At this point I was still considering adding the electronics and battery in a waterproof box at the back of the board. The wires from the motor simply feed up the inside of the mast and through the board. But then I started thinking I’d like a bigger battery and more range, and that meant I needed to heat sink the controller and manage the weight of the components better. A waterproof box sunk into the deck at the center of balance seemed like a better choice.
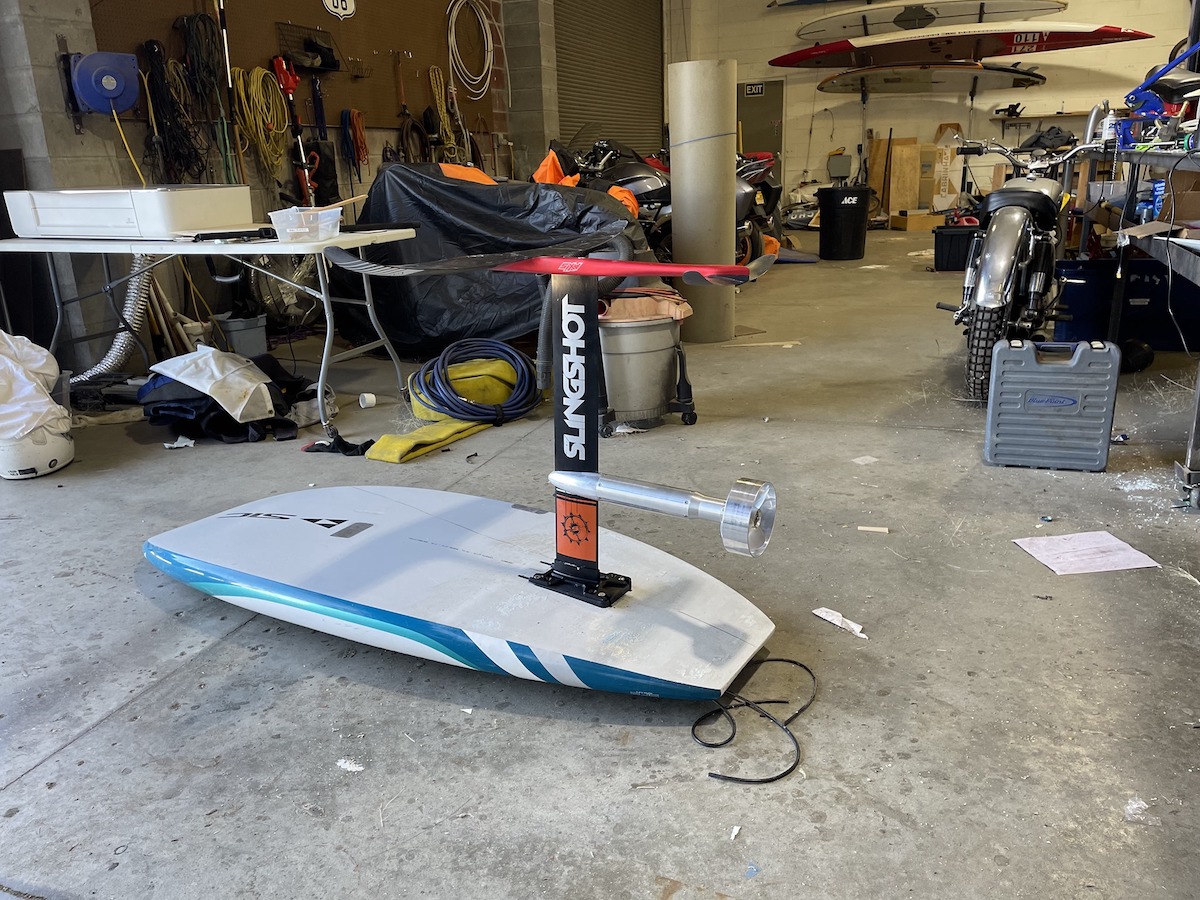
The slingshot mast fits the motor without requiring modifications other than drilling holes in the mast to run the wires in.
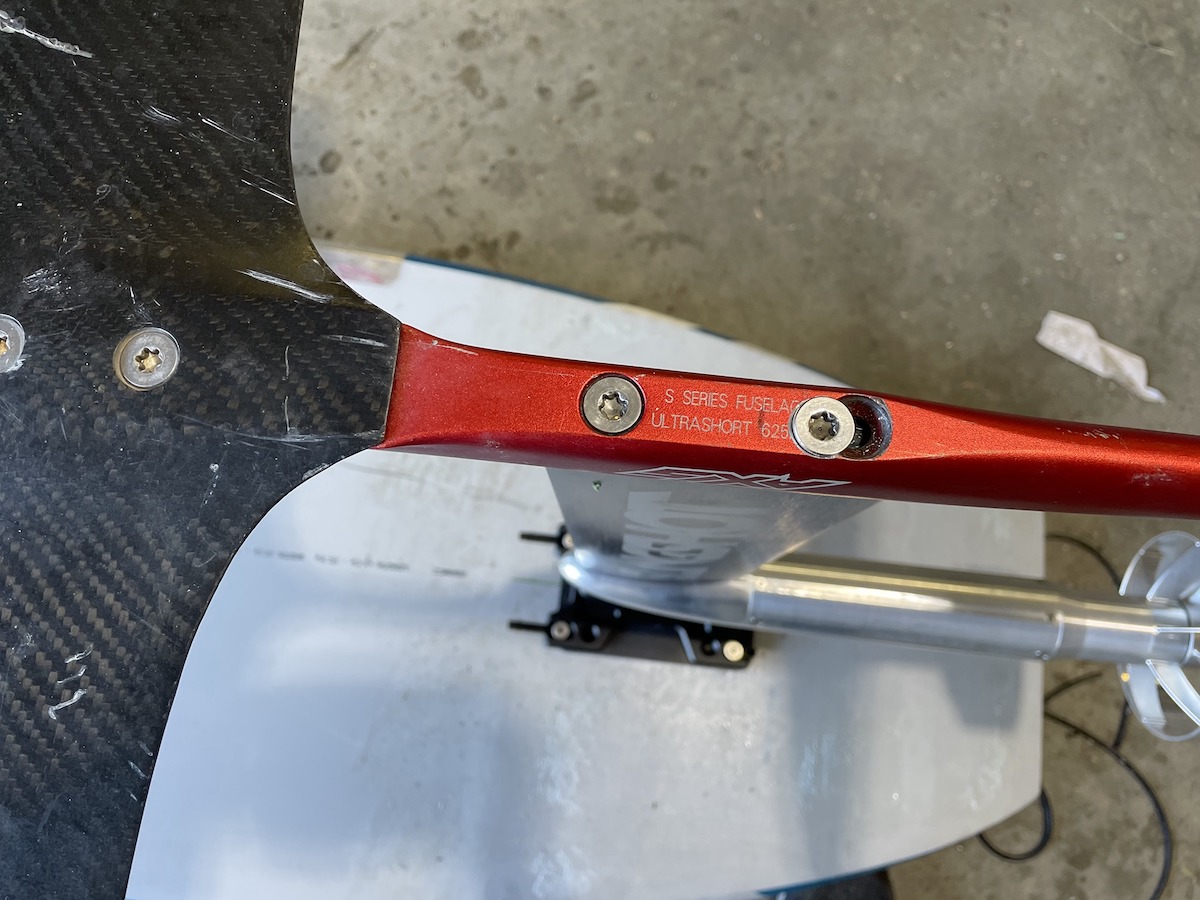
I could use a slingshot foil system, but I prefer Axis wings, so I modified an Axis fuselage to fit the smaller Slingshot mast. I changed the screw spacing to accommodate the mast and then filled the gaps with a fiberglass shim, and chopped carbon scraps with thickened epoxy. The result is quite rigid but is not removable.